
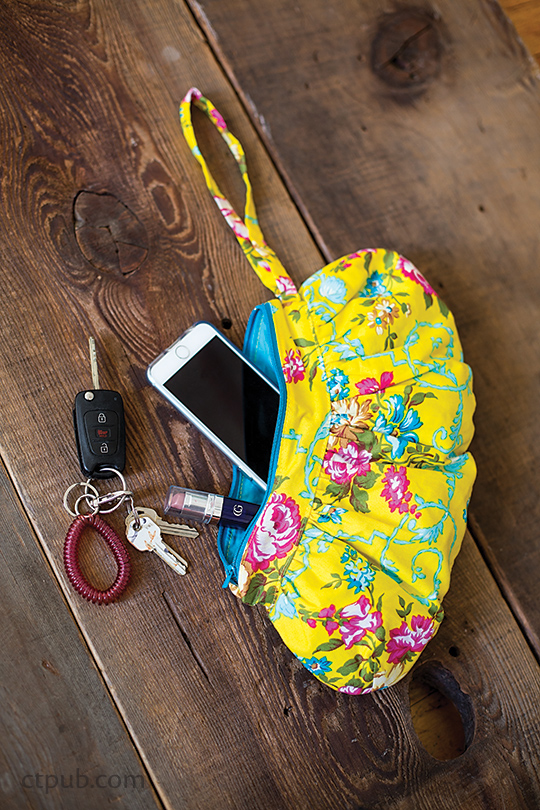
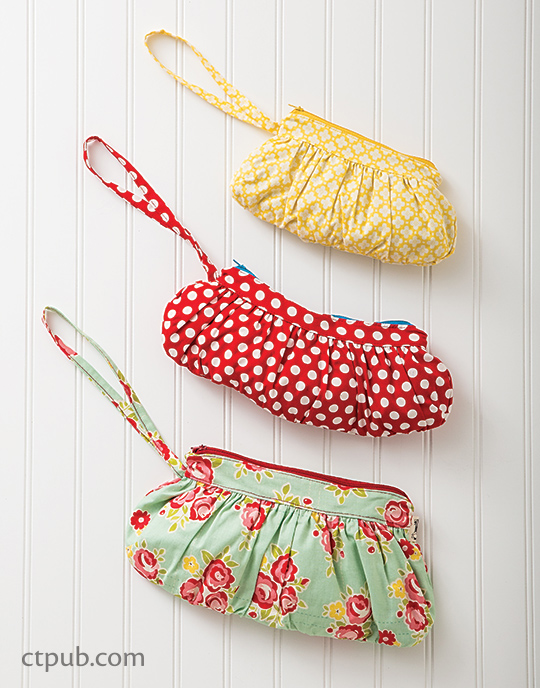
With their defining gathers, these Gathered Zipper Pouches are a
simple set that has an easy process of adding the zippers. The gathers not only
add beauty to the pattern but they are practical by giving the pouch more
storage room. With a few of these pouches inside your purse, you’ll have an
organized and convenient carry-around companion! You can also add a loop as a
handle for easier carrying.
All three pouches can be made with the same fabric or with three
different fabrics—the options are endless! This is also the perfect gift set.
Finished Sizes:
Large: 13 1/2˝ wide × 5˝ high × 2 1/2˝ deep
Medium: 12˝ wide × 4˝ high × 2 1/2˝ deep
Small: 9 1/2˝ wide × 4˝ high × 2 1/2˝ deep
Skill Level: Confident Beginner
Materials
Amounts are based on 42˝-wide fabric and are for 3 pouches (1 of
each size).
3/4 yard for exterior
3/4 yard for lining
1 1/4 yards of fusible interfacing
10˝ all-purpose zipper for large
9˝ all-purpose zipper for medium
7˝ all-purpose zipper for small
Note: A 3/8˝
seam allowance is included on the pattern. Backstitch at the beginning and
end of each seam.
Cutting
Cut out the exterior, lining, and interfacing pieces as listed
below.
Large Pouch
Exterior
2 pieces 10 1/4˝ × 2 1/8˝ for Front/Back Top Panel
2 pieces 19˝ × 6 1/4˝ for Large Pouch Panel
1 piece 19˝ × 1 3/4˝ for wrist strap
Lining
2 pieces 10 1/4˝ × 2 1/8˝ for Front/Back Top Panel
2 pieces 19˝ × 61/4˝ for Large Pouch Panel
Interfacing
2 pieces 10 1/4˝ × 2 1/8˝ for Front/Back Top Panel
2 pieces 19˝ × 6 1/4˝ for Large Pouch Panel
Refer to the Large Pouch Panel
diagram to trace and trim the bottom corners
all of the Large Pouch panels using the Gathered Zipper Pouches
Corner (Large) pattern.
Medium Pouch
Exterior
2 pieces 9 3/4˝ × 1 3/4˝ for Front/Back Top Panel
2 pieces 18˝ × 4 7/8˝ for Medium Pouch Panel
1 piece 19˝ × 1 3/4˝ for wrist strap
Lining
2 pieces 9 3/4˝ × 1 3/4˝ for Front/Back Top Panel
2 pieces 18˝ × 4 7/8˝ for Medium Pouch Panel
Interfacing
2 pieces 9 3/4˝ × 1 3/4˝ for Front/Back Top Panel
2 pieces 18˝ × 4 7/8˝ for Medium Pouch Panel
Refer to the Medium Pouch Panel
diagram to trace and trim the bottom corners
of all the Medium Pouch Panels using the Gathered Zipper Pouches
Corner Template (Medium) pattern.
Small Pouch
Exterior
2 pieces 7 3/4˝ × 1 3/4˝ for Front/Back Top Panel
2 pieces 14 3/4˝ × 4 7/8˝ for Small Pouch Panel
1 piece 15˝ × 1 3/4˝ for loop
Lining
2 pieces 7 3/4˝ × 1 3/4˝ for Front/Back Top Panel
2 pieces 14 3/4˝ × 4 7/8˝ for Small Pouch Panel
Interfacing
2 pieces 7 3/4˝ × 1 3/4˝ for Front/Back Top Panel
2 pieces 14 3/4˝ × 4 7/8˝ for Small Pouch Panel
Refer to the Small Pouch Panel
diagram to trace and trim the bottom corners
of all the Small Pouch Panels using the Gathered Zipper Pouches
Corner (Small) pattern.
Sewing the Front and Back Pieces
1. Fuse the interfacing to the wrong side of the lining pieces.
2. Lay the exterior front piece wrong side up. Fold the
dart on the lower corner right sides together, matching the dart lines. Pin and
stitch along the dart lines, backstitching at the beginning and end. Press
the darts on the front piece toward the center. Stitch the back darts in
the same manner, but press the darts on the back piece toward the outside edge.
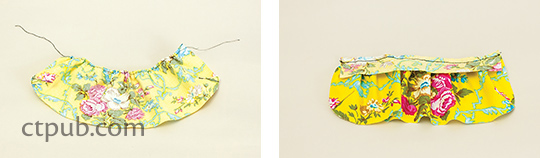
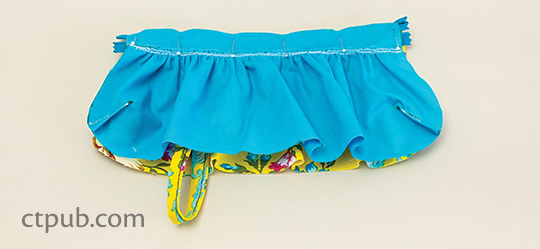
3. Make the gathers along the straight top edges of the pouch
panels. Sew 2 rows of hand or machine basting stitches on the fabric,
within the seam allowance, as marked on the pattern. Leave a few inches of
thread at each end.
4. Pin at each end of the gathering stitches and wind the
threads around the first pin in a figure-eight shape. Gently pull the threads
at the other end until the gathered piece has been shortened to match the piece
it will be sewn to.
5. Wind these threads around the second pin in the same manner
and spread the gathers evenly.
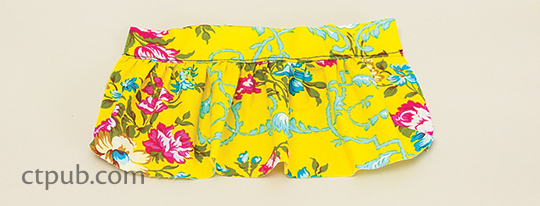
6. Place and pin a pouch panel and a top panel with right sides
together. Sew each set of pieces together and press the seams toward the top
panel.
7. Topstitch the top panels 1/8˝ from the seam.
8. Repeat Steps 2–7 for the lining pieces.
Attaching the Wrist
Strap
1. Fold the strap in half lengthwise, wrong sides together, and
press to make a crease.
2. Open the strap with the wrong side facing you. Fold in each
long side of the strap to the center crease and press.
3. Fold in half again along the first crease,press, and pin.
Topstitch 1/8˝ from the double-folded edge.
4. Fold the strap in half. Place and baste it onto the left side
edge of the top panel.
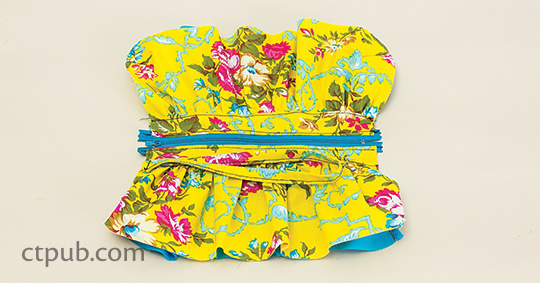
Installing the
Zipper
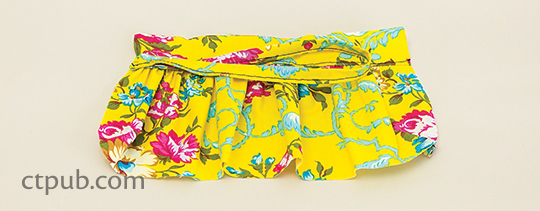
1. Close the zipper and lay it on the exterior top panel with
right sides together. You will be able to see the wrong side of the zipper. Pin
the zipper and panel in place. Stitch the panel and zipper using a zipper foot,
sewing 1/4˝ from the zipper coil. Backstitch to secure.

2. Place the lining piece and exterior with the zipper installed
with right sides together. The zipper will now be between the exterior and the
lining.
3. Pin and stitch the 3 layers together along the previous
stitching line.
4. Flip the lining over to the wrong side and press. Topstitch
the top panel close to the seam through all the layers.
5. Repeat Steps 1–4 for the other exterior and lining pieces.
Assembling the
Exterior and Lining
1. Gather each exterior bottom until it is 16˝ wide for large,
15˝ wide for medium, or 12˝ wide for small.
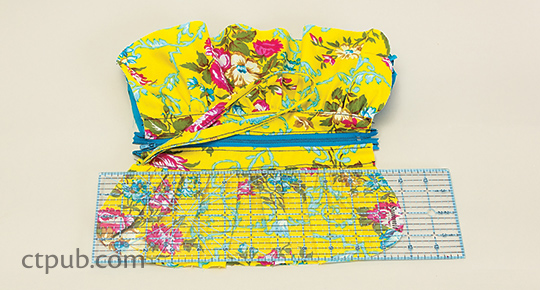
2. Repeat Step 1 for the lining pieces.
3. Match the exteriors with right sides together and then place
the lining with right sides together. Open the zipper before you sew all the
way around the pouch. It’s very difficult to turn it right side out when the
zipper is closed. Pin and sew all around the pouch. Carefully sew over the
zipper coils. Leave a 4˝ gap on the bottom of the lining to turn it right side
out.
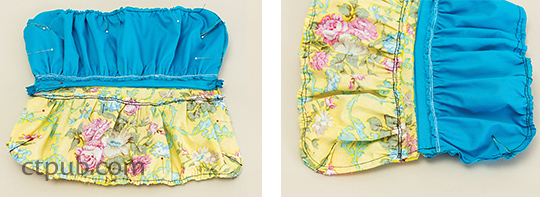
4. Notch the curved seam and clip the zipper panel seams.
5. Turn the pouch right side out through the opening in the
lining. Using a turning tool, push out the curved corners. Stitch the opening
closed. Press the pouch flat.


0 comments:
Post a Comment
I hope you enjoy the blog http://www.crochetaddictuk.com!
Thank you ever so much for commenting!
I love reading everything you put and I will try and reply but it just depends on my health.
Thanks Sue